Rimfire Ammo: Accuracy Tips for Competitive Shooting
Competitive rimfire shooting demands precision, consistency, and an acute understanding of your equipment and ammunition. Achieving top scores requires more than just natural talent; it’s about mastering the nuances that separate good shots from exceptional ones. This guide dives deep into the factors influencing accuracy in rimfire competitions, from selecting the optimal rimfire ammo to fine-tuning your rifle and perfecting your shooting technique.
Whether you’re a seasoned competitor or just starting out, the insights shared here will empower you to elevate your game and achieve new levels of performance. We’ll explore everything from understanding the importance of bullet weight and velocity to mastering the fundamentals of trigger control and breathing. Prepare to unlock the secrets to rimfire accuracy and dominate on the range.
Dominate the Rimfire Range: Beyond the Basics
Why Accuracy Matters in Competitive Rimfire Shooting
In competitive rimfire shooting, accuracy isn’t just important – it’s the *only* thing that matters. Unlike some shooting disciplines where speed or power might compensate for minor inaccuracies, rimfire competitions are often decided by the smallest margins. A single millimeter can be the difference between a podium finish and also-ran status. The quest for ultimate accuracy drives shooters to obsess over every detail, from the quality of their rifle to the consistency of their ammunition.
The scoring systems used in these competitions further emphasize the importance of precision. Target faces are designed with progressively smaller scoring rings, rewarding shots that land closer to the center. Even slight deviations from your intended point of impact can drastically reduce your score. Furthermore, the mental aspect of the sport is heavily influenced by accuracy. Confidence in your equipment and technique directly translates to a calmer, more focused mindset, allowing you to perform under pressure. Therefore, understanding and optimizing for accuracy is paramount for success in any form of competitive rimfire shooting.
Example: A shooter, Sarah, consistently placed in the top 10 at local rimfire matches. By meticulously analyzing her ammo performance and adjusting her rifle’s trigger pull, she improved her average group size by 0.1 inches at 50 yards. This seemingly small improvement propelled her to consistent podium finishes and a regional championship win. This demonstrates the tangible impact of refined accuracy in competitive shooting.
Understanding the Key Elements of Rimfire Precision
Achieving precision in rimfire shooting involves a complex interplay of factors. No single element guarantees success, but understanding how they interact is crucial for optimizing your performance. These factors can be broadly categorized into equipment, ammunition, and technique. On the equipment side, the rifle itself is paramount. The barrel’s quality, the trigger’s characteristics, and the stability of the stock all contribute significantly to accuracy. Ammunition plays an equally vital role; consistent bullet weight, velocity, and primer ignition are essential for repeatable results. See also the article, Reloading Primers: Top Brands Compared for Accuracy.
Technique encompasses the shooter’s ability to control their body, breathing, and trigger pull. A stable shooting platform, proper breathing control, and a smooth, consistent trigger squeeze are fundamental for minimizing movement and ensuring repeatable shots. Furthermore, understanding environmental factors such as wind and light conditions is essential for making accurate adjustments. Many shooters use ballistic calculators to account for environmental variables when practicing on outdoor ranges.
In addition, proper maintenance is a key element often overlooked. A clean rifle will perform much better than a dirty one. Consistent cleaning and lubrication will ensure the best performance. Remember to thoroughly clean the barrel and action following each shooting session to ensure reliable and accurate results. Regular maintenance prevents build-up that affects consistency.
Choosing the Right Rimfire Ammo: A Data-Driven Approach
Match-Grade vs. Standard Ammunition: Understanding the Differences
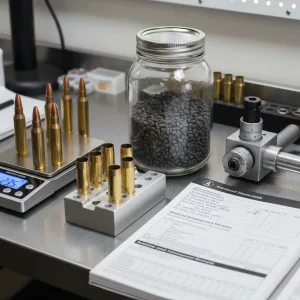
When it comes to rimfire ammo, the choice between match-grade and standard ammunition can significantly impact your performance in competitive shooting. Standard ammunition is mass-produced with a focus on affordability and general reliability. While suitable for casual plinking and practice, it typically lacks the consistency required for serious competition. Match-grade ammunition, on the other hand, is manufactured to much tighter tolerances, with meticulous attention paid to bullet weight, dimensions, and powder charge. This results in greater consistency in velocity and trajectory, leading to tighter groupings on the target.
The price difference between match-grade and standard ammunition reflects the increased manufacturing costs and quality control measures involved. However, the investment in match-grade ammo is often justified by the improved accuracy and consistency it provides, especially in high-stakes competitions where every shot counts. Many competitive shooters conduct rigorous testing to determine which brand and type of match-grade ammo performs best in their specific rifle. This involves shooting multiple groups at various distances and analyzing the results to identify the most accurate and consistent load.
Example: A shooter named Tom spent hours testing different brands of match-grade .22 LR ammo in his competition rifle. He discovered that one particular brand consistently produced groups that were 25% tighter than the others at 50 yards. While it was more expensive, the increased accuracy gave him a significant edge in competitions, ultimately leading to improved scores and higher rankings. Understanding how primers optimize performance and consistency is discussed at length in this article: Reloading Primers: Optimize Performance and Consistency.
Bullet Weight and Velocity: Finding the Sweet Spot for Your Rifle
Bullet weight and velocity are two critical factors that influence a rimfire cartridge’s trajectory and stability. Generally, heavier bullets tend to be more stable in flight and less susceptible to wind drift, but they also have lower velocities and greater bullet drop at longer ranges. Lighter bullets, on the other hand, have higher velocities and flatter trajectories, but they can be more affected by wind and may not stabilize as well in some rifles. Finding the optimal combination of bullet weight and velocity for your specific rifle requires careful testing and experimentation.
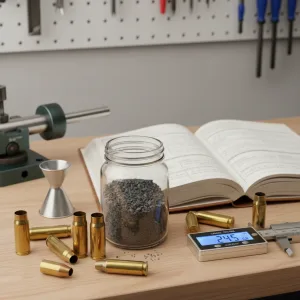
Most competitive rimfire shooters use 40-grain bullets, as they tend to strike a good balance between stability and velocity. However, some rifles may perform better with lighter or heavier projectiles. Velocity variations also play a crucial role. Extreme Spread (ES) and Standard Deviation (SD) are two metrics used to measure velocity consistency. Lower ES and SD values indicate greater consistency, which translates to more predictable trajectories. Investing in a chronograph to measure the velocity of your ammunition is highly recommended for serious competitors. A chronograph provides valuable data for analyzing ammunition performance and identifying the most consistent lots.
Actionable step: Set up a chronograph and record the velocity of at least ten shots for each type of rimfire ammo you’re testing. Calculate the Extreme Spread and Standard Deviation. Compare the results to determine which ammo exhibits the most consistent velocity. Remember to perform these tests under similar environmental conditions to ensure accurate comparisons.
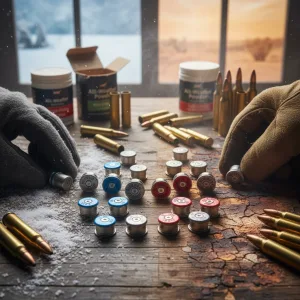
Primer Selection: A Crucial Factor Often Overlooked
The primer is a critical component of a rimfire cartridge, responsible for igniting the powder charge and initiating the firing sequence. While often overlooked, the primer’s consistency and sensitivity can significantly impact accuracy. Rimfire primers are integrated into the case rim, making them more susceptible to variations in manufacturing and storage conditions. Consistent primer ignition is essential for ensuring consistent velocity and trajectory. Variations in primer sensitivity can lead to inconsistent ignition delays, affecting shot-to-shot consistency.
Some manufacturers use proprietary priming compounds designed to enhance ignition reliability and consistency. These advanced priming formulations can improve accuracy, especially in cold weather conditions where primer sensitivity may be reduced. Lot-to-lot variations in primer performance are also a concern. Even within the same brand and type of ammunition, different lots may exhibit slight differences in primer sensitivity and ignition characteristics. Therefore, it’s crucial to test multiple lots of ammunition to identify the most consistent performers. A shooter might test five different lots of the same brand of primers for optimal performance.
The way a primer is seated and how it affects the overall process are critical to the quality of your ammunition. It is often said that the primer is the “heart” of the cartridge. Understanding the primer’s role, and how to properly handle, seat, and store primers will help you optimize the accuracy and consistency of your rimfire ammo.
Rimfire Rifle Optimization: Maximizing Your Firearm’s Potential
Barrel Quality and Length: How They Affect Accuracy
The barrel is arguably the most critical component of a rimfire rifle when it comes to accuracy. The barrel’s quality, construction, and length all influence the bullet’s trajectory and stability. High-quality barrels are typically made from premium steel alloys and undergo precise manufacturing processes to ensure consistent bore dimensions and smooth rifling. The rifling, consisting of spiral grooves inside the barrel, imparts a spin on the bullet as it travels down the bore, stabilizing it in flight. Barrels with consistent bore dimensions and sharp, well-defined rifling tend to produce greater accuracy.
Barrel length is another important consideration. Longer barrels generally offer slightly higher velocities and longer sight radii, potentially improving accuracy at longer ranges. However, excessively long barrels can be unwieldy and may not be ideal for all shooting positions. Shorter barrels, on the other hand, are more maneuverable and can be advantageous in certain shooting scenarios. Many competitive shooters prefer barrel lengths between 18 and 20 inches, as they strike a good balance between velocity, stability, and maneuverability.
Furthermore, the method of barrel attachment to the receiver can also affect accuracy. Properly installed barrels, whether threaded or pinned, ensure consistent alignment and minimize vibration. Aftermarket barrels are often available for popular rimfire rifles, offering improved accuracy and performance. When considering an aftermarket barrel, it’s essential to choose one from a reputable manufacturer and have it professionally installed. This ensures optimal alignment and consistent performance.
Trigger Tuning: Achieving a Consistent and Predictable Pull
The trigger is the interface between the shooter and the rifle, and its characteristics can significantly impact accuracy. A consistent and predictable trigger pull is essential for minimizing unwanted movement and ensuring repeatable shots. A heavy or gritty trigger can make it difficult to maintain a steady aim, while an inconsistent trigger can lead to unpredictable shot placement.
Many competitive shooters invest in aftermarket triggers or have their factory triggers tuned by a gunsmith to achieve a lighter, smoother, and more consistent pull. Trigger tuning typically involves adjusting the trigger’s weight, creep, and overtravel. Trigger weight refers to the amount of force required to pull the trigger. A lighter trigger generally makes it easier to maintain a steady aim, but it’s important to ensure that the trigger is still safe and reliable. Creep refers to the amount of movement the trigger exhibits before it releases the sear. Minimizing creep results in a cleaner, more predictable break. Overtravel refers to the amount of movement the trigger exhibits after the sear has released. Reducing overtravel can also improve consistency.
Achieving a consistent trigger pull is not just about the trigger itself; it’s also about developing proper trigger control technique. This involves positioning your finger correctly on the trigger, applying consistent pressure, and avoiding jerking or slapping the trigger. Regular dry-fire practice can help you develop proper trigger control and improve your consistency.
Stock Options: Ergonomics and Stability for Enhanced Performance
The rifle stock serves as the foundation for the entire shooting system, providing a stable platform for the rifle and a comfortable interface for the shooter. The stock’s design, material, and adjustability all influence ergonomics and stability, which in turn affect accuracy. A well-designed stock should allow the shooter to maintain a natural and comfortable shooting position, with proper cheek weld and reach to the trigger.
Different stock materials offer varying degrees of rigidity and vibration damping. Wood stocks are traditional and aesthetically pleasing but can be susceptible to changes in temperature and humidity. Synthetic stocks are more durable and resistant to environmental factors, making them a popular choice for competitive shooting. Adjustable stocks allow the shooter to customize the fit and feel of the rifle, optimizing ergonomics and stability. Adjustable cheek pieces and butt plates enable shooters to fine-tune their shooting position and maintain proper eye alignment with the scope.
The choice of stock depends on individual preferences and shooting style. Some shooters prefer traditional wooden stocks for their classic feel and aesthetics, while others prioritize the durability and adjustability of synthetic stocks. Ultimately, the best stock is the one that allows you to maintain a consistent and comfortable shooting position, minimizing movement and maximizing accuracy.
Mastering the Fundamentals: Techniques for Consistent Shot Placement
Breathing Control: Synchronization for a Steady Aim
Breathing control is a fundamental aspect of marksmanship that directly impacts the stability of your aim. Even subtle movements caused by breathing can disrupt your sight picture and affect shot placement. Mastering breathing control involves learning to synchronize your breathing with your shooting sequence, minimizing movement during the critical moment of trigger pull.
The most common technique involves taking a few deep breaths to relax and oxygenate your body, then exhaling partially and holding your breath just before initiating the shot. This allows you to maintain a stable shooting platform and minimize movement. The key is to hold your breath for only a brief period, typically no more than a few seconds, to avoid oxygen deprivation and muscle tremors.
Practicing breathing control is essential for developing consistency. Regular dry-fire practice can help you refine your breathing technique and synchronize it with your trigger pull. Focus on maintaining a relaxed and steady posture, minimizing unnecessary tension in your muscles. With consistent practice, breathing control will become second nature, allowing you to maintain a stable aim even under pressure.
Trigger Control: Smooth and Deliberate Squeezing
Trigger control is arguably the most critical aspect of marksmanship, as it directly influences the consistency and accuracy of your shots. A smooth and deliberate trigger squeeze minimizes unwanted movement and allows you to maintain a steady aim throughout the firing sequence. Jerking or slapping the trigger can disrupt your sight picture and cause the rifle to move, resulting in inaccurate shots.
Proper trigger control involves positioning your finger correctly on the trigger, applying consistent pressure, and avoiding any sudden or jerky movements. The ideal trigger finger placement is typically in the middle of the pad of your index finger, allowing you to apply even pressure without pulling the rifle to one side. The key is to apply pressure slowly and steadily, gradually increasing the force until the trigger breaks. Avoid anticipating the shot, as this can lead to premature trigger pulls and inaccurate shots.
Dry-fire practice is invaluable for developing proper trigger control. Focus on maintaining a steady aim while applying smooth and consistent pressure to the trigger. Pay attention to any unwanted movement or tremors in your muscles, and consciously work to eliminate them. With consistent practice, you can develop a smooth and deliberate trigger squeeze that minimizes unwanted movement and maximizes accuracy.
Follow-Through: Maintaining Focus After the Shot
Follow-through is an often-overlooked aspect of marksmanship that plays a crucial role in maintaining accuracy and consistency. Follow-through involves maintaining your focus and position after the shot has broken, ensuring that you don’t inadvertently disrupt your aim or recoil control. This means continuing to hold your breath, maintain your trigger squeeze, and keep your cheek weld on the stock for a brief moment after the bullet has left the barrel.
The purpose of follow-through is to allow the rifle to recoil naturally without any interference from your body. By maintaining your position and focus, you can minimize unwanted movement and ensure that the rifle returns to its original point of aim. This helps to improve consistency and allows you to make accurate adjustments for subsequent shots.
Practicing follow-through is essential for developing good shooting habits. After each shot, consciously focus on maintaining your position and focus for a few seconds before relaxing. Pay attention to how the rifle recoils and make any necessary adjustments to your grip or stance. With consistent practice, follow-through will become second nature, helping you to maintain accuracy and consistency in your shooting.
The Importance of Cleaning and Maintenance for Rimfire Accuracy
Consistent cleaning and maintenance are paramount for achieving top-tier accuracy in rimfire competitions. Rimfire ammunition, particularly .22LR, is known for leaving significant residue in the barrel, a byproduct of its lead composition and priming compounds. This residue accumulates over time, disrupting the bullet’s trajectory and causing inconsistencies in shot placement. Imagine a scenario where, after just 200 rounds, a noticeable drop in accuracy occurs due to a fouled barrel. Regularly scheduled cleaning, tailored to your shooting volume, can mitigate these issues. Furthermore, neglecting maintenance can lead to corrosion and wear, reducing the lifespan and performance of your rifle.
Frequency and Methods for Cleaning Your Rimfire Rifle
The frequency of cleaning depends on several factors, including the type of ammunition used and the environmental conditions. A good starting point is to clean your rimfire rifle every 200-300 rounds. However, if you notice a decline in accuracy before reaching that point, clean it sooner. In humid environments, more frequent cleaning might be necessary to prevent corrosion. When cleaning, use a bore brush and solvent specifically designed for firearms. Start by running a solvent-soaked patch through the bore, followed by several passes with the bore brush. Finish with dry patches until they come out clean. Always brush from the chamber to the muzzle to avoid damaging the crown of the barrel. Some competitive shooters even clean their rifles after each match to ensure peak performance.
Preventing Lead Buildup: Solutions for Optimal Barrel Performance
Lead buildup is a common problem with rimfire rifles. To minimize this, consider using ammunition with a copper-plated bullet. Copper plating helps to reduce the amount of lead deposited in the barrel. If you frequently shoot lead ammunition, a dedicated lead-removing solvent can be highly effective. One effective approach involves using a bore snake with integrated bronze brushes, followed by solvent application and subsequent scrubbing. Alternatively, specialized lead removal tools are available that mechanically scrape the lead from the barrel without damaging the rifling. Example: A shooter using standard lead .22LR noticed significant accuracy degradation after 300 rounds. Switching to copper-plated rounds and cleaning every 200 rounds improved groupings by 25% at 50 yards.
Proper Lubrication: Ensuring Smooth Operation and Longevity
After cleaning, proper lubrication is essential for smooth operation and to prevent corrosion. Apply a light coat of gun oil to all moving parts, including the bolt, trigger mechanism, and any areas where metal surfaces contact each other. Be careful not to over-lubricate, as excessive oil can attract dirt and debris, potentially causing malfunctions. A thin, even coating is all that is needed. Consider using a synthetic lubricant, as these tend to perform better in extreme temperatures and offer superior corrosion protection compared to traditional petroleum-based oils. Remember to wipe off any excess oil to prevent it from migrating to areas where it could affect accuracy, such as the bedding surfaces.
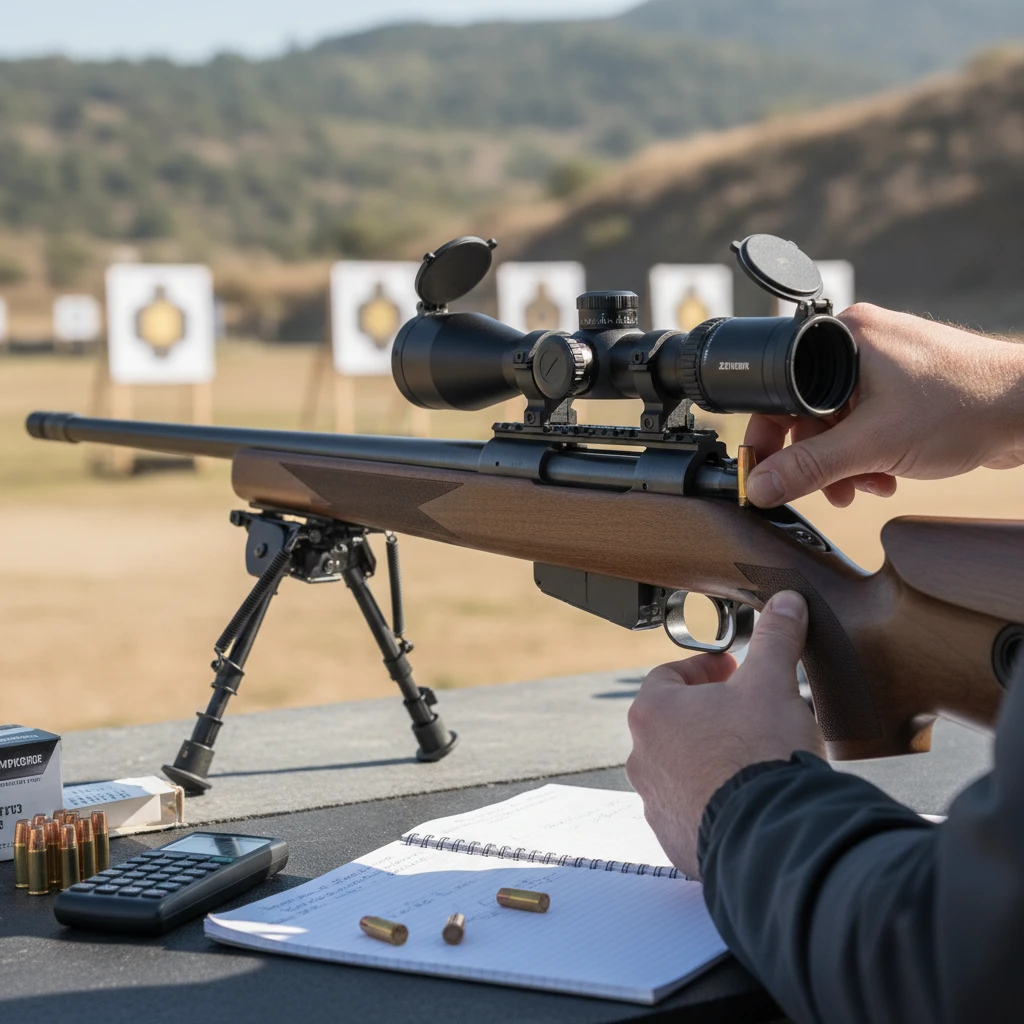
Advanced Optics for Rimfire Competitions: Enhancing Your Precision
In rimfire competitions, where small margins separate winners from the rest, advanced optics become an indispensable tool. A high-quality scope can significantly enhance your ability to see and accurately engage targets at various distances. Investing in a scope designed specifically for rimfire rifles, with features tailored to the unique demands of the sport, can provide a considerable advantage. This includes features like adjustable parallax, precise turrets for windage and elevation adjustments, and a reticle designed for accurate holdovers and windage compensation. Furthermore, the quality of the glass and the overall construction of the scope play a crucial role in delivering a clear and reliable sight picture, even in challenging lighting conditions.
Choosing the Right Scope Magnification and Reticle
Selecting the right scope magnification depends on the typical distances you’ll be shooting and your personal preference. For rimfire competitions, a variable power scope with a magnification range of 3-9x or 4-12x is a common choice. Higher magnification can be beneficial for longer distances, but it can also reduce the field of view and make it more difficult to acquire targets quickly. The reticle is another critical consideration. Fine crosshairs are ideal for precision shooting, while more complex reticles with holdover points can be useful for compensating for bullet drop at varying distances. Mil-dot reticles or those with MOA (Minute of Angle) markings are popular among competitive shooters, allowing for precise adjustments based on range and wind conditions. Example: A competitor switched from a fixed 4x scope to a variable 6-18x scope with a mil-dot reticle and saw a 15% improvement in long-range accuracy at 100 yards.
Parallax Adjustment: Eliminating Errors at Different Distances
Parallax adjustment is a crucial feature for rimfire scopes, particularly when shooting at varying distances. Parallax occurs when the target image and the reticle are not on the same focal plane, leading to aiming errors if your eye is not perfectly centered behind the scope. Many high-quality rimfire scopes have an adjustable objective lens or a side parallax knob that allows you to correct for parallax at different distances. To adjust parallax, focus on the target until it appears clear and sharp, then adjust the parallax knob until the reticle appears to remain stationary relative to the target, even when you move your head slightly. Failure to properly adjust parallax can introduce significant errors, especially at longer distances.
Scope Mounting and Zeroing: Achieving Perfect Alignment
Proper scope mounting and zeroing are fundamental to achieving perfect alignment and consistent accuracy. Start by selecting high-quality scope mounts that are compatible with your rifle’s receiver and the scope’s tube diameter. Ensure that the mounts are securely attached to the receiver and that the scope is properly seated in the rings. Use a torque wrench to tighten the screws to the manufacturer’s recommended specifications to avoid damaging the scope or the mounts. Once the scope is mounted, zero it at the distance you’ll be shooting most frequently. This typically involves shooting a group of three to five shots and adjusting the windage and elevation turrets until the group is centered on the target. After zeroing, confirm the zero at different distances to verify the scope’s tracking accuracy.
Reading the Wind: Compensating for Environmental Factors
Successfully reading and compensating for the wind is an essential skill for competitive rimfire shooting. Even a slight breeze can significantly affect the trajectory of a .22LR bullet, especially at longer distances. Mastering this skill requires a combination of knowledge, experience, and the use of appropriate tools. Understanding the principles of wind behavior, learning to accurately assess wind direction and velocity, and knowing how to adjust your aim accordingly are crucial for achieving consistent accuracy in varying environmental conditions. Neglecting to account for wind can result in missed shots and inconsistent performance, regardless of the quality of your rifle or ammunition.
Understanding Wind Direction and Velocity
To accurately read the wind, you must first understand its behavior. Wind direction refers to the direction from which the wind is blowing, while wind velocity refers to its speed. Wind direction is typically described in terms of cardinal directions (e.g., north, south, east, west) or as clock positions relative to the shooter. Wind velocity is usually measured in miles per hour (mph) or kilometers per hour (km/h). The effects of wind on a bullet’s trajectory are most pronounced when the wind is blowing perpendicular to the bullet’s path (a full-value wind). A wind blowing at an angle will have a reduced effect, proportional to the angle. Learning to visualize the wind’s effects on your bullet’s trajectory is key to making accurate adjustments.
Using Wind Flags and Other Tools for Accurate Assessment
Wind flags are an invaluable tool for assessing wind direction and velocity on the shooting range. These flags are typically made of lightweight material and are placed at various distances downrange. By observing the angle and movement of the flags, you can get a sense of the wind’s behavior along the bullet’s path. In addition to wind flags, other tools can be helpful, such as anemometers (wind meters), which provide a precise measurement of wind velocity at the shooting position. Some shooters also use mirage, the visual distortion caused by heat rising from the ground, to help them assess wind conditions. Observing the direction and intensity of the mirage can provide clues about the wind’s direction and velocity that might not be apparent from wind flags alone. The US Army provides resources on judging wind effects for marksmanship: FM 3-22.9, Rifle Marksmanship.
Adjusting Your Aim for Windage and Elevation
Once you have assessed the wind direction and velocity, you need to adjust your aim accordingly. This typically involves adjusting the windage and elevation turrets on your scope or using holdover points on your reticle. The amount of adjustment required will depend on the distance to the target, the bullet’s ballistic coefficient, and the wind conditions. Ballistic calculators and apps can be helpful for determining the appropriate adjustments, but it’s also important to develop a sense of how much the wind affects your bullet’s trajectory at different distances. This comes with practice and experience. Example: A shooter at 100 yards facing a 5 mph crosswind might need to adjust their windage by 1 MOA (Minute of Angle) to compensate for the wind’s effect.
Dry Firing Drills: Building Muscle Memory and Sharpening Your Skills
Dry firing drills are an incredibly valuable tool for rimfire competitors, allowing them to hone their skills and build muscle memory without the cost and noise of live ammunition. Regular dry firing practice can significantly improve your trigger control, sight alignment, breathing technique, and overall shooting consistency. By focusing on these fundamental aspects of shooting in a controlled environment, you can develop a more refined and repeatable shooting process that translates into improved performance on the range. Furthermore, dry firing can help you identify and correct flaws in your technique that might not be apparent during live fire.
Safe Dry Firing Practices: Preventing Accidental Discharges
Safety is paramount when engaging in dry firing exercises. Before beginning any dry firing session, ensure that your firearm is unloaded. Double-check the chamber and magazine to confirm that there are no live rounds present. It’s also a good practice to store all ammunition in a separate location away from your dry firing area to prevent accidental loading. Choose a safe direction to point your firearm during dry firing, preferably towards a backstop or a wall that can safely contain a bullet in the event of an accidental discharge. Consider using snap caps, which are inert cartridges designed to protect the firing pin from damage during dry firing. These are especially important for rimfire firearms, as dry firing without snap caps can sometimes cause damage to the firing pin or the chamber face.
Developing a Consistent Routine for Effective Training
To maximize the benefits of dry firing, it’s important to develop a consistent routine that focuses on the fundamental aspects of shooting. Start by setting up your shooting position, ensuring that you have a stable and comfortable stance. Focus on your breathing technique, taking slow, deep breaths to calm your nerves and steady your aim. Practice your trigger control, squeezing the trigger smoothly and consistently without disturbing your sight alignment. Pay close attention to your follow-through, maintaining your focus on the target even after the “shot” has been fired. Repeat this process multiple times, focusing on consistency and repeatability. Over time, this will help to build muscle memory and refine your shooting technique. Many competitive shooters dedicate 15-30 minutes each day to dry firing drills, focusing on specific aspects of their shooting form.
Identifying and Correcting Flaws in Your Technique
One of the key benefits of dry firing is the ability to identify and correct flaws in your shooting technique. During your dry firing sessions, pay close attention to your movements and reactions. Are you flinching when you “pull the trigger”? Is your sight alignment drifting during your trigger squeeze? Are you anticipating the “shot” and jerking the rifle? By being mindful of these potential flaws, you can begin to address them and develop more consistent shooting habits. Record your sessions to observe your movements and identify areas that need improvement. This can be done with a simple smartphone camera. Pay special attention to grip and stance, which are known sources of inconsistency. For instance, even subtle changes in how a shooter grips the rifle or positions their body can affect shot placement at longer distances.
Alternatives to Rimfire for Competitive Shooting (and When to Choose Them)
While rimfire ammunition is excellent for certain competitive disciplines, it’s not the only option. Depending on the distance, level of precision required, and budget, shooters often consider centerfire rifles or even air rifles. Understanding the strengths and weaknesses of each alternative helps in making informed decisions for specific competitive scenarios. Factors to consider include the cost of ammunition, effective range, wind sensitivity, and the rules of the specific shooting competition.
Centerfire Rifles: Precision at Longer Distances
For competitions demanding extreme accuracy at extended ranges, centerfire rifles generally outperform rimfire options. Centerfire cartridges, such as .223 Remington or 6mm Creedmoor, provide flatter trajectories and are less susceptible to wind drift. This makes them ideal for disciplines like precision rifle series (PRS) or long-range target shooting. However, the increased performance comes at a cost. Centerfire ammunition is significantly more expensive than rimfire ammo, and the rifles themselves typically require a larger investment. Furthermore, the recoil of centerfire rifles can be a factor for some shooters, particularly during extended matches. Example: In a PRS match with targets out to 800 yards, a 6mm Creedmoor rifle will generally offer a competitive edge over a .22LR due to its superior ballistics and wind resistance. When selecting a centerfire rifle, look at the ballistic coefficient, inherent accuracy of the platform, and availability of match-grade ammunition.
Air Rifles: Cost-Effective Training and Backyard Practice
Air rifles, particularly those chambered in .177 or .22 caliber, provide a cost-effective and convenient alternative for training and practice, especially at shorter distances. They offer a way to hone fundamental shooting skills without the expense and logistical considerations of firearms. High-quality air rifles can achieve surprising levels of accuracy at distances of 10-50 yards, making them suitable for disciplines like 10-meter air rifle or backyard plinking. One key advantage is the ability to practice in locations where firearms use might be restricted. Example: A competitive shooter uses an air rifle for dry-fire practice, saving on ammunition costs while still improving trigger control and sight alignment. The initial cost of a quality air rifle can be substantial, but the ongoing cost of ammunition is significantly lower than both rimfire and centerfire options. Just be aware that they are VERY distance-limited compared to rimfire.
Troubleshooting Common Rimfire Accuracy Issues: Diagnosing and Solving Problems
Even with high-quality rimfire ammunition and a well-maintained rifle, accuracy problems can arise. Troubleshooting these issues systematically can pinpoint the root cause and lead to effective solutions. Common problems include inconsistent groupings, keyholing, and misfires. Addressing these issues requires careful observation, attention to detail, and a methodical approach to diagnosis and correction.
Inconsistent Groupings: Identifying the Root Cause
Inconsistent groupings, where shots are scattered across the target rather than forming a tight cluster, can be frustrating. Several factors can contribute to this issue. The shooter’s technique is paramount. Inconsistent trigger pull, improper breathing, or poor follow-through can all lead to erratic shots. Ammunition variations also play a role. Rimfire ammunition is known to have lot-to-lot variations, with some lots performing better than others in a given rifle. Rifle maintenance is essential. A dirty or poorly maintained barrel can significantly impact accuracy. Finally, scope mounting can be a factor. Loose scope rings or a poorly mounted scope can cause shifts in the point of impact. Actionable step: Try shooting from a bench rest to isolate the shooter’s technique as the source of the problem. If groupings improve significantly, then the problem likely lies in shooting fundamentals. Another test is to switch to known high-quality rimfire ammunition to see if that helps.
Keyholing: Addressing Stability Problems
Keyholing, where bullets strike the target sideways, leaving an elongated hole resembling a keyhole, indicates that the bullet is not properly stabilized in flight. This is often caused by an improperly sized bullet for the barrel, a damaged crown, or a barrel with a worn or damaged rifling. It can also be caused by shooting ammunition that is significantly underpowered. Addressing keyholing requires a careful inspection of the rifle’s barrel. A gunsmith can examine the crown for damage and assess the condition of the rifling. Experimenting with different types of ammunition can also help. Some rifles may perform better with heavier bullets, while others prefer lighter ones. If you suspect a damaged crown, a gunsmith can recrown the barrel to improve accuracy. Actionable step: Start by cleaning the barrel thoroughly and then try different ammunition types. If keyholing persists, consult a qualified gunsmith to inspect the barrel.
Misfires and Duds: Handling Ammunition Malfunctions
Misfires and duds, where the cartridge fails to ignite when the firing pin strikes, are a common occurrence with rimfire ammunition. While some misfires are simply unavoidable due to manufacturing defects, others can be caused by a dirty or worn firing pin, or a weak hammer spring. To minimize the risk of misfires, keep the rifle’s action clean and properly lubricated. Regularly inspect the firing pin for wear or damage. When a misfire occurs, follow safe handling procedures. Keep the rifle pointed in a safe direction for at least 30 seconds to allow for a potential delayed ignition (hangfire). Carefully extract the cartridge and dispose of it properly. Do not attempt to refire a rimfire cartridge that has already failed to ignite, as this can be dangerous. It’s also wise to check the primers of your ammo when reloading to check for similar issues in handloads. Actionable step: Establish a consistent procedure for handling misfires, prioritizing safety at all times.
Gear Up for Success: Essential Accessories for Rimfire Accuracy
Beyond the rifle and ammunition, several accessories can significantly enhance rimfire accuracy. These tools help to stabilize the rifle, fine-tune the shooter’s aim, and provide feedback on shot placement. Investing in quality accessories can make a noticeable difference in competitive performance.
Bipods and Shooting Rests: Providing a Stable Platform
Bipods and shooting rests are essential for providing a stable platform, especially when shooting from the prone or benchrest positions. Bipods attach to the rifle’s forend and provide a stable two-legged support. They are particularly useful in field shooting situations where a bench is not available. Shooting rests, such as sandbags or adjustable pedestals, offer an even more stable platform, ideal for benchrest shooting. When selecting a bipod or shooting rest, consider its adjustability, stability, and ease of use. A good bipod should allow for easy adjustments in height and cant, while a quality shooting rest should provide a solid and wobble-free support. Example: A shooter uses a Harris bipod during a precision rimfire match, allowing for stable and repeatable shots from the prone position. Remember that your choice of bipod/rest depends on the shooting position and type of competition. A good choice will give you an edge, while a poor choice will be a hinderance.
Rear Bags: Fine-Tuning Your Aim
A rear bag is a small, sand-filled or bead-filled bag that is placed under the rifle’s buttstock to provide additional support and fine-tune the shooter’s aim. It allows for precise vertical adjustments, helping the shooter to achieve a perfect sight picture. Rear bags come in various shapes and sizes, so it’s important to choose one that fits comfortably in the shooter’s hand and provides the desired level of support. Some rear bags also feature adjustable straps or Velcro closures for added security. Practice using the rear bag to develop a smooth and consistent technique. Example: A shooter uses a Protektor Model rear bag to make small vertical adjustments while aiming at a small target at 50 yards. Experiment with different fill materials, like sand or plastic beads, to find the ideal weight and density.
Spotting Scopes: Observing Your Shots and Making Adjustments
A spotting scope is a high-powered telescope used to observe the target at long distances and analyze shot placement. It allows the shooter to see where their shots are landing and make necessary adjustments to their aim. A spotting scope is particularly useful in rimfire competitions where the targets are small and the distances are significant. When selecting a spotting scope, consider its magnification, image quality, and field of view. A higher magnification will allow you to see the target in greater detail, while a wider field of view will make it easier to locate the target quickly. Look for a spotting scope with ED (extra-low dispersion) glass for superior image clarity and color rendition. Having a quality spotting scope is crucial for making informed decisions during a match. Remember to consider factors like portability and ease of setup as well.
2026: The Evolution of Rimfire Ammo and Shooting Techniques
The world of rimfire shooting is constantly evolving, with ongoing advancements in ammunition technology and shooting techniques. In 2026, we’re seeing a greater emphasis on precision-engineered rimfire ammunition designed for specific competitive disciplines. Manufacturers are focusing on tighter tolerances, more consistent bullet weights, and improved ballistic coefficients. Furthermore, shooters are adopting more sophisticated training methods, incorporating data analysis and advanced ballistics software to optimize their performance. We are also seeing the impact of technology, with tools that measure trigger pull and aiming stability. These modern approaches are improving accuracy and consistency, and are raising the bar for competitive rimfire shooters across all disciplines. Keep in mind that regular practice with high-quality ammunition is crucial for success.


Add comment