Reloading Primers: Diagnosing Common Ignition Problems
Reloading your own ammunition offers unparalleled control over performance and cost. However, achieving consistent and reliable ignition is paramount for both accuracy and safety. Understanding how primers function and how to diagnose potential issues is crucial for any serious reloader, whether you’re crafting precision rimfire ammo or potent handgun ammo.
This guide will delve into the intricacies of primer ignition, exploring common problems, their causes, and effective troubleshooting techniques. By mastering these fundamentals, you can ensure consistent ignition, enhance accuracy, and maintain the highest levels of safety in your reloading process, especially if you are working on loads using carefully selected smokeless gun powder.
Unlocking Reloading Precision: Why Primer Ignition Matters
The Role of Primers in Reliable Ammunition
The primer’s role in ammunition is simple yet critical: to initiate the controlled explosion that propels the bullet. It acts as the catalyst, bridging the gap between the firing pin strike and the ignition of the main propellant charge. A properly functioning primer delivers a consistent and precisely timed spark, ensuring that the smokeless gun powder ignites completely and efficiently. Without reliable primer ignition, the entire reloading process is compromised. Issues can range from inconsistent velocities to outright failure of the cartridge to fire.
Impact of Primer Performance on Accuracy and Consistency
Primer performance has a direct impact on the accuracy and consistency of your reloads. Inconsistent ignition can lead to variations in muzzle velocity, affecting bullet trajectory and point of impact. Small variations in primer brisance (the shattering effect of the explosion) can translate to significant differences downrange. Therefore, selecting the correct primer for your load and ensuring consistent seating depth is crucial for achieving optimal results. For instance, choosing primers known for their consistency can significantly tighten your group sizes. Furthermore, understanding how primers interact with different powder types is essential for creating accurate and reliable ammunition. A consistent primer will minimize shot-to-shot variation, leading to improved overall accuracy.
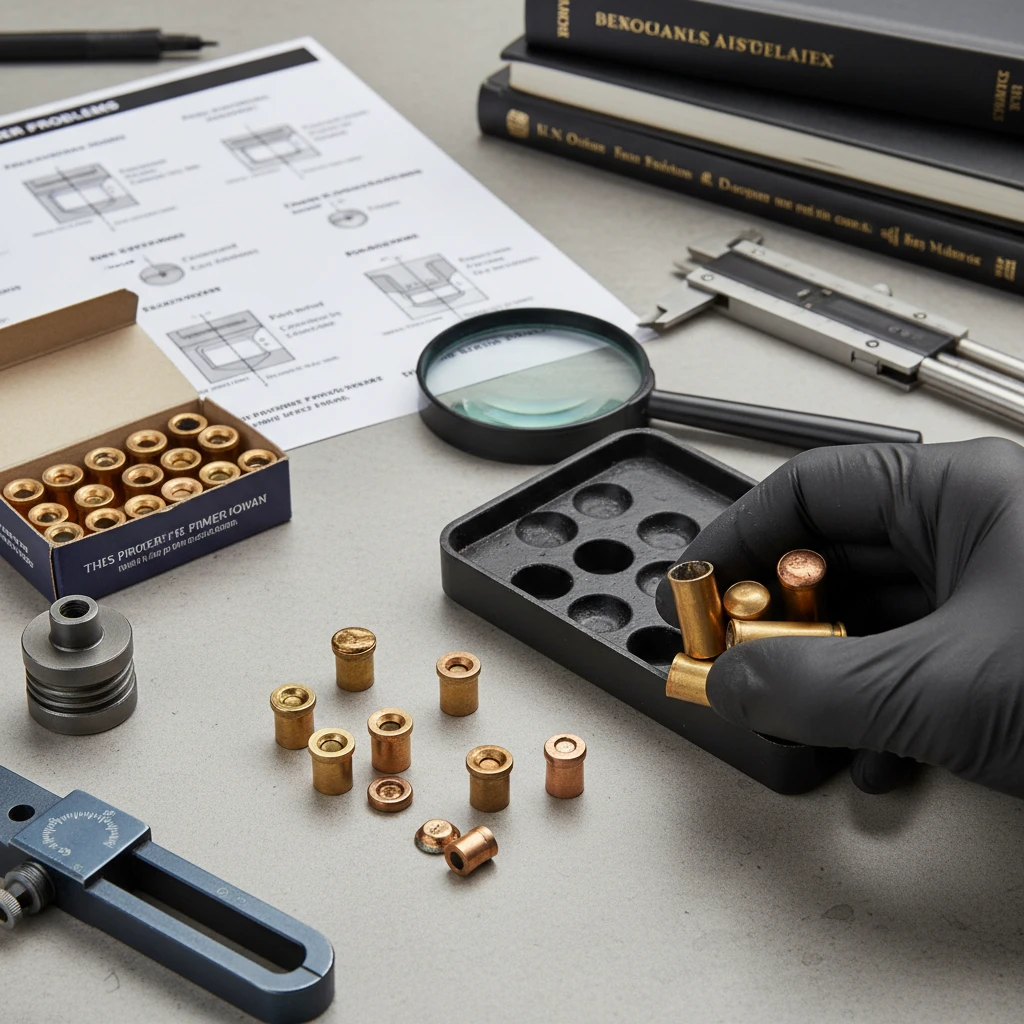
Primer Anatomy 101: Understanding the Components
Primer Cup: Material and Dimensions
The primer cup is the metal casing that houses all the other components of the primer. Typically made of brass or copper alloy, the cup’s material and dimensions are crucial to its performance. Brass cups are often softer and easier to ignite with a lighter firing pin strike, while copper cups offer greater resistance to deformation under high pressure. The cup’s dimensions, including its depth and diameter, must be precisely manufactured to ensure proper seating in the primer pocket of the cartridge case. Variations in these dimensions can lead to seating problems and inconsistent ignition. The cup must also be strong enough to withstand the pressures generated during firing without rupturing or leaking gas, ensuring safety and reliability.
Priming Compound: Composition and Sensitivity
The priming compound is the explosive mixture contained within the primer cup that is ignited by the firing pin strike. Modern priming compounds are typically a blend of lead styphnate, tetrazene, and other sensitizing agents. The composition of the priming compound directly affects its sensitivity, brisance, and overall performance. Some primers are formulated to be more sensitive than others, requiring a lighter firing pin strike for reliable ignition. This is particularly important for firearms with lighter hammer springs. The amount of priming compound and its distribution within the cup also play a role in ignition consistency. Variations in compound composition or distribution can lead to inconsistent ignition and variations in muzzle velocity.
Anvil: Design and Function
The anvil is a small, internal component within the primer that provides a stable surface against which the priming compound is crushed and detonated. The firing pin strikes the primer cup, which in turn crushes the priming compound against the anvil, creating the necessary friction and impact for ignition. The anvil’s design, including its shape and height, is critical for ensuring consistent and reliable ignition. A properly designed anvil will provide a uniform and concentrated impact point for the priming compound, maximizing its explosive potential. The material of the anvil is also important, as it must be strong enough to withstand the force of the firing pin strike without deforming. Variations in anvil design or material can lead to inconsistent ignition and even misfires.
Common Primer Ignition Issues: A Troubleshooting Guide
Hangfires: Delayed Ignition and Potential Causes
A hangfire is a dangerous situation where there is a noticeable delay between the firing pin strike and the ignition of the cartridge. The delay can range from a fraction of a second to several seconds, creating a very hazardous condition for the shooter. Potential causes of hangfires include contaminated priming compound, insufficient firing pin energy, or deteriorated primer components due to age or improper storage. The shooter should always maintain a safe firing position, keeping the firearm pointed downrange for at least 30 seconds after a hangfire before attempting to eject the cartridge. Understanding the specific symptoms of a hangfire and identifying the root cause are essential for preventing future occurrences and ensuring safe shooting practices.
Misfires: Complete Failure to Ignite
A misfire occurs when the primer fails to ignite the powder charge after the firing pin strikes. This results in a complete failure of the cartridge to fire. Common causes of misfires include a defective primer, insufficient firing pin strike, or an obstruction in the firing pin channel. Defective primers can result from manufacturing flaws, contamination, or improper storage. An insufficient firing pin strike may be due to a weak hammer spring, excessive headspace, or a dirty firing pin channel. When a misfire occurs, it is crucial to follow safe handling procedures, keeping the firearm pointed in a safe direction and waiting at least 30 seconds before ejecting the cartridge. Inspecting the primer for a firing pin indentation can provide clues about the cause of the misfire.
Squib Loads: Insufficient Powder Ignition
A squib load is a dangerous occurrence where the primer ignites, but the smokeless gun powder only partially ignites, resulting in a bullet becoming lodged in the barrel. This is often accompanied by a weak report and little to no recoil. Squib loads are typically caused by insufficient powder charge, incorrect primer selection for the powder type, or contaminated powder. Attempting to fire another round after a squib load can cause severe damage to the firearm and potentially injure the shooter. If a squib load is suspected, immediately cease firing, safely unload the firearm, and carefully inspect the barrel for obstructions. Using accurate load data and ensuring proper powder measurements are essential for preventing squib loads. As an example, a reloader using a progressive press who forgets to add powder to one round might experience this.
Diagnosing the Root Cause: Primer-Related Problems
Primer Seating Depth: Too Shallow or Too Deep?
Proper primer seating depth is critical for reliable ignition. A primer that is seated too shallow may not be fully contacted by the firing pin, leading to misfires or inconsistent ignition. Conversely, a primer that is seated too deeply can be overly compressed, potentially damaging the priming compound and also leading to misfires. The ideal seating depth is typically just below flush with the case head, usually around 0.003-0.005 inches. Using a primer seating tool or a reloading press with a consistent seating depth feature is essential for achieving proper seating depth. Visually inspecting seated primers and using a primer depth gauge can help ensure that they are seated correctly. Always consult your reloading manual for specific seating depth recommendations. It’s also worth noting that variations in brass case manufacture can influence ideal seating depth.
Primer Contamination: Oil, Moisture, and Other Culprits
Primer contamination is a common cause of ignition problems. Oil, moisture, and other foreign substances can degrade the priming compound, rendering it less sensitive or completely inert. Oil from handling or from the reloading press can seep into the primer, while moisture can cause the priming compound to deteriorate over time. Always handle primers with clean, dry hands and store them in a cool, dry place. Avoid using cleaning solvents or lubricants near primers, and ensure that your reloading equipment is clean and free of oil residue. If primers are suspected of being contaminated, they should be discarded safely. Proper storage and handling practices are essential for preventing primer contamination and ensuring reliable ignition.
Primer Age and Storage Conditions
The age and storage conditions of primers can significantly impact their reliability. Primers have a limited shelf life, and their performance can degrade over time, especially if they are stored improperly. High humidity, extreme temperatures, and exposure to direct sunlight can all accelerate the deterioration of the priming compound. Primers should be stored in their original packaging in a cool, dry, and dark location. Avoid storing primers in areas with fluctuating temperatures or high humidity levels. While some primers can remain viable for many years under ideal conditions, it’s generally recommended to use older primers first and to periodically inspect them for signs of deterioration. Signs of deterioration may include discoloration, corrosion, or a change in smell. If you suspect that your primers have deteriorated due to age or improper storage, it’s best to discard them safely and purchase fresh primers. Consulting resources like the SAAMI (Sporting Arms and Ammunition Manufacturers’ Institute) guidelines SAAMI.org can also provide additional guidance on safe ammunition storage practices.
Diagnosing the Root Cause: Firearm-Related Problems
Firing Pin Issues: Wear, Damage, and Protrusion
A common cause of primer ignition failure lies within the firearm itself. The firing pin is crucial for delivering the necessary impact to ignite the primer. Over time, firing pins can experience wear and tear, leading to rounded or chipped tips. These defects reduce the pin’s ability to effectively indent the primer cup. Regularly inspect your firing pin for any signs of damage. In addition to wear, check the firing pin protrusion. This refers to the distance the firing pin extends beyond the bolt face when fully forward. Insufficient protrusion, often caused by a broken or weak firing pin spring, results in light strikes and misfires. Most firearms manufacturers provide specifications for proper firing pin protrusion. Deviation from these measurements indicates a problem requiring professional gunsmithing.
Example: John had a series of misfires with his hunting rifle. Upon inspection, the firing pin showed significant rounding at the tip. Replacing the firing pin resolved the issue, restoring reliable ignition. Conversely, another shooter, Mary, experienced similar problems. Her firing pin appeared intact, but the protrusion was 0.010″ less than the manufacturer’s specification. The gunsmith discovered a cracked firing pin spring, which was preventing full firing pin extension. After replacement, the rifle functioned perfectly. Remember to always consult your firearm’s manual or a qualified gunsmith for proper diagnostics and repair.
Hammer Spring Weakness: Insufficient Force
The hammer spring provides the necessary force to drive the hammer forward, striking the firing pin. A weak or broken hammer spring reduces the impact force, leading to inconsistent or failed primer ignition. Over time, hammer springs can lose their tension due to repeated compression cycles or corrosion. Signs of a weak hammer spring include light primer strikes and an overall “mushy” feel to the trigger pull. Replacing a worn hammer spring is generally a straightforward process, often requiring only basic tools and a replacement spring of the correct specification for your firearm model. You can find appropriate options available from various manufacturers specializing in firearm components. Consider upgrading to a high-power hammer spring if you frequently encounter ignition issues, especially with harder primer cups.
Example: A competitive shooter named Mike noticed an increasing number of misfires in his handgun. The primers showed very faint dents. Suspecting a weak hammer spring, he replaced it with a new, factory-specified spring. The misfires disappeared immediately, demonstrating the direct correlation between hammer spring strength and reliable ignition. Another reloader, Sarah, was using a new batch of primers known for their hard cups. She initially experienced frequent misfires. After installing a slightly stronger hammer spring, she achieved consistent ignition without any further problems. Troubleshooting common reloading issues often involves checking fundamental components like the hammer spring.
Headspace Problems: Excessive or Insufficient
Headspace refers to the distance between the breech face and the datum line on the cartridge case. This dimension is crucial for ensuring proper cartridge seating and reliable ignition. Excessive headspace allows the cartridge to sit too deeply in the chamber, potentially leading to light strikes or even case ruptures. Insufficient headspace prevents the cartridge from fully chambering, which also can cause failures to fire. Headspace issues are less common in modern firearms, but they can arise from manufacturing defects, wear, or modifications. Diagnosing headspace requires specialized gauges and should be performed by a qualified gunsmith. Addressing headspace problems typically involves reaming the chamber or adjusting the barrel. Such work should *only* be performed by a professional to ensure safety and proper function.
Example: Tom purchased a used rifle and experienced frequent misfires, despite using properly reloaded ammunition and verified primers. A gunsmith determined that the rifle had excessive headspace. This was allowing the cartridge to move forward slightly upon firing pin impact, cushioning the blow and preventing reliable ignition. Another shooter, Emily, had a custom-built handgun. She encountered difficulty chambering certain brands of ammunition and experienced numerous failures to fire. A gunsmith identified insufficient headspace, preventing the cartridge from fully seating in the chamber. Remember that issues with rimfire ammo can often be traced to firearm-related causes as well.
Diagnosing the Root Cause: Reloading Process Issues
Incorrect Powder Charge: Under or Over-Loaded
An improper powder charge is a significant contributor to reloading malfunctions and can manifest as ignition problems. An under-loaded cartridge may produce insufficient pressure to properly seat the bullet and ignite the primer effectively, especially with slower-burning powders. The lack of pressure can lead to squib loads, where the bullet lodges in the barrel. Conversely, an over-loaded cartridge generates excessive pressure, which can damage the firearm and potentially cause primer issues, such as pierced or flattened primers, or even primer blowouts. Always adhere strictly to published load data from reputable sources when determining powder charges. Accurate load data is crucial for safe and consistent reloading. Use a calibrated scale to measure powder charges precisely. Double-check each charge before seating the bullet to avoid errors.
Example: A novice reloader, Dave, mistakenly used a powder charge that was 2 grains below the minimum recommended load for his cartridge. He experienced several failures to ignite. Upon inspection, the primers showed very light strikes and unburnt powder was visible in the case. Another reloader, Lisa, accidentally double-charged a cartridge. While the cartridge did fire, the primer was severely flattened, and the bolt was difficult to open. She immediately disassembled the remaining cartridges and carefully remeasured each charge. Always reference load data and ensure your equipment is calibrated. Northern Reloading provides access to a wealth of resources to ensure your reloading process is safe and accurate.
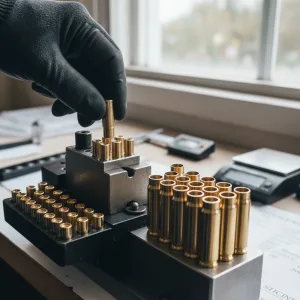
Case Preparation: Primer Pocket Cleaning and Uniformity
Proper case preparation is essential for consistent primer seating and reliable ignition. The primer pocket must be clean and free of debris. Fouling, residue, and carbon buildup can prevent the primer from seating fully and uniformly, leading to misfires. Use a primer pocket cleaning tool to remove any obstructions before seating the primer. Furthermore, ensure the primer pocket is uniform in depth and diameter. Some reloaders use a primer pocket uniformer to achieve consistent dimensions, which enhances primer seating consistency. Uniform primer seating contributes significantly to consistent ignition and accuracy. Avoid over-cleaning the primer pocket, as excessive removal of material can loosen the primer fit.
Example: A precision shooter, Greg, noticed inconsistent velocities and occasional misfires in his reloads. He realized that he had neglected to clean the primer pockets thoroughly. After implementing a primer pocket cleaning step in his case preparation process, his velocity variations decreased, and the misfires disappeared. Another reloader, Maria, experimented with primer pocket uniforming. She found that it improved her group sizes at longer distances, indicating a more consistent ignition process. Consistent case preparation, including primer pocket maintenance, is a key component of achieving reloading consistency.
Crimping Issues: Excessive or Insufficient
Crimping secures the bullet in the case and can influence pressure buildup during ignition. Excessive crimping can deform the bullet and case, potentially damaging the primer or reducing its sensitivity. Over-crimping can also increase pressure to unsafe levels. Insufficient crimping may not provide enough bullet tension, which can lead to bullet setback during feeding in semi-automatic firearms. Bullet setback significantly increases pressure, creating a hazardous condition. Adjust your crimp die carefully to achieve the appropriate amount of crimp for your cartridge and bullet type. A slight taper crimp is generally sufficient for most handgun rounds, while a roll crimp may be necessary for heavy-recoiling rifle cartridges. Inspect your finished rounds for proper crimp appearance. The bullet should be firmly seated without any visible deformation of the case mouth.
Example: A handgun shooter, Kevin, experienced frequent bullet setback in his reloads due to insufficient crimp. This caused erratic accuracy and occasional failures to feed. By increasing the crimp slightly, he eliminated the bullet setback problem and improved his shooting performance. A rifle reloader, Susan, over-crimped her rounds in an attempt to improve accuracy. However, she noticed that her primers were becoming flattened and pierced. By reducing the crimp, she resolved the primer issues and maintained good accuracy. The amount of crimp should be carefully considered. Remember, reloading for beginners and pros requires close attention to each step to prevent issues and ensure safety.
Step-by-Step Inspection: Identifying Defective Primers
Visual Inspection: Dents, Cracks, and Corrosion
A thorough visual inspection is the first line of defense in identifying potentially defective primers. Examine each primer carefully under good lighting for any signs of damage, such as dents, cracks, or corrosion. Dents can indicate prior mishandling or impacts. Cracks in the primer cup compromise its integrity and can lead to misfires or even dangerous ruptures during firing. Corrosion suggests exposure to moisture or harsh chemicals, which can degrade the primer’s explosive compound. Any primer exhibiting these defects should be immediately discarded. Do not attempt to use damaged primers, as they pose a significant safety risk. Properly storing your primers is key to preventing damage.
Example: While reloading, a reloader named Bob noticed several primers with small dents on the anvil. He discarded these primers, suspecting they had been damaged during handling. Another reloader, Carol, found a box of primers that had been stored in a damp basement. The primers showed signs of corrosion. She properly disposed of the entire box, recognizing the potential for unreliable ignition. Proper storage is covered later. Visual examination is the first critical step in ensuring that your primers are safe and reliable.
Primer Cup Integrity: Checking for Weakness
The primer cup is the metal casing that holds the priming compound. Its integrity is crucial for containing the explosion upon firing pin impact. A weak or deformed primer cup can rupture, causing gas leakage and potential damage to the firearm. To check for cup integrity, gently press the primer cup against a hard surface. The cup should feel firm and resist deformation. If the cup feels soft or easily gives way, it is likely compromised and should be discarded. Avoid applying excessive pressure, as this could detonate the primer. This test is not foolproof, but it can help identify significantly weakened primer cups. Always handle primers with care to avoid damaging them during the loading process. If any doubt exists, err on the side of caution and discard the primer.
Example: While seating primers, a reloader, Alan, noticed that some of the primers felt unusually soft and easily deformed under slight pressure. He suspected that the primer cups were weak and discarded the suspect batch. Another reloader, Beth, experienced several primer ruptures during firing. Upon inspecting the remaining primers, she found that the primer cups were thin and easily dented. She switched to a different brand of primers known for their robust cup construction. This highlights the importance of checking for signs of a weak primer cup before loading.
Lot Number Tracking: Identifying Potential Recalls
Lot numbers are used by primer manufacturers to track batches of primers and identify potential manufacturing defects. If a problem is discovered with a particular lot, the manufacturer may issue a recall. Keep a record of the lot numbers of your primers. This allows you to check for any recalls or safety notices that may affect your supply. Primer manufacturers typically publish recall information on their websites or through industry publications. Subscribe to newsletters or online forums to stay informed about potential recalls. If you suspect that your primers are affected by a recall, discontinue use immediately and contact the manufacturer for further instructions. Proper documentation and record keeping can prevent accidents.
Example: A reloader, Charles, received an email from a reloading forum regarding a recall of a specific lot of primers due to inconsistent priming compound. He checked his inventory and found that he had several boxes of primers from the recalled lot. He contacted the manufacturer, who arranged for a replacement. The primers are recalled rarely, but it is imperative to check as reloading safety starts with awareness and knowledge.
Safe Handling and Disposal of Misfired Primers
Proper Storage of Unused Primers
Proper storage is paramount to maintaining the stability and reliability of unused primers. Primers should be stored in a cool, dry, and well-ventilated location, away from direct sunlight, heat sources, and open flames. Excessive heat can degrade the priming compound, leading to misfires or even spontaneous ignition. High humidity can cause corrosion and deterioration of the primer cup. Keep primers in their original packaging or in airtight containers to protect them from moisture and contaminants. Store primers separately from smokeless powder and loaded ammunition. A dedicated storage cabinet or container is recommended. Clearly label the containers with the contents and any relevant safety information. It’s advisable to store primers in small quantities. This minimizes the risk of a large-scale event in case of accidental ignition. Always follow local regulations regarding the storage of explosive materials. Proper primer selection and storage go hand in hand for optimal results.
Deactivating and Disposing of Misfired Primers
Misfired primers require careful deactivation and disposal to prevent accidental ignition. Never attempt to reuse a misfired primer. The priming compound may be unstable or damaged, posing a significant safety risk. The safest method for deactivating a misfired primer is to soak it in penetrating oil or water for several days. This will neutralize the priming compound and render the primer inert. After soaking, the primer can be safely discarded. Some reloaders use a dedicated primer disposal tool to safely crush the primer cup and render the priming compound harmless. Dispose of deactivated primers in accordance with local regulations for hazardous waste. Do not simply throw them in the trash, as this could pose a risk to sanitation workers.
Safety Precautions: Eye Protection and Ventilation
Reloading activities, including handling primers, should always be conducted with appropriate safety precautions. Eye protection is essential to protect your eyes from flying debris in case of accidental primer ignition. Wear safety glasses or a face shield whenever handling primers, seating them, or depriming spent cases. Good ventilation is also crucial to prevent the buildup of potentially harmful fumes from the priming compound. Work in a well-ventilated area or use a ventilation system to remove fumes. Avoid eating, drinking, or smoking while reloading, as this could introduce contaminants or increase the risk of accidental ingestion of priming compound. Keep your work area clean and organized to prevent accidents. Always follow safe reloading practices to minimize the risk of injury. Even when using top brands of primers, always prioritize your safety.
Choosing the Right Primer: Factors to Consider
Primer Size: Small Pistol, Large Pistol, Small Rifle, Large Rifle
Selecting the correct primer size is paramount for safe and reliable reloading. The four common sizes are small pistol, large pistol, small rifle, and large rifle. Using the wrong size can lead to several problems, ranging from failure to ignite the cartridge to dangerous over-pressure situations. Always consult your reloading manual for the specific cartridge you are loading. For instance, a 9mm cartridge uses a small pistol primer, while a .45 ACP typically uses a large pistol primer. Conversely, a .223 Remington uses a small rifle primer, and a .30-06 Springfield uses a large rifle primer. A pitfall to avoid is assuming primer sizes are interchangeable based on caliber alone. Always double-check load data. Keep in mind that even within the same caliber, different manufacturers might suggest different primer sizes depending on the load data.
Primer Sensitivity: Standard vs. Magnum
Primer sensitivity is another crucial factor. Standard primers are designed for typical loads and provide consistent ignition. Magnum primers, on the other hand, are designed to ignite larger powder charges or powders that are harder to ignite. Using a magnum primer with a standard load can increase pressure and velocity beyond safe limits. For example, if you are reloading a .357 Magnum with a heavy charge of slow-burning powder, a magnum primer is generally recommended. However, if you’re loading a light target load in the same cartridge, a standard primer will suffice. If you are unsure which primer to use, start with the recommended primer in your reloading manual and carefully monitor for signs of overpressure. Some powders are notoriously difficult to ignite, especially in cold weather, making a magnum primer a necessity. Refer to load data and powder manufacturer recommendations, as some powders *require* magnum primers for safe and complete combustion. You can also check out our guide to selecting primers for more details.
Compatibility with Smokeless Gun Powder and Cartridge Type
The type of smokeless gun powder you are using significantly impacts primer selection. Some powders, particularly ball powders and certain slow-burning powders, require a hotter primer for reliable ignition. The cartridge type also plays a role. High-pressure cartridges often benefit from more robust primers. For instance, when reloading for a semi-automatic rifle like an AR-15, a primer with a slightly thicker cup might be preferred to prevent slam fires. Understanding the burn rate of your powder is also essential. Faster-burning powders generally ignite more easily and may not require a magnum primer, even in magnum cartridges. However, slower-burning powders need a hotter primer to ensure complete combustion, especially in colder temperatures. Always cross-reference your powder manufacturer’s data with your primer choice to ensure optimal compatibility and safety, especially since accurate load data depends on these factors. For instance, some reloaders find that Winchester primers are compatible with many types of powder.
Optimizing Primer Performance: Tips and Best Practices
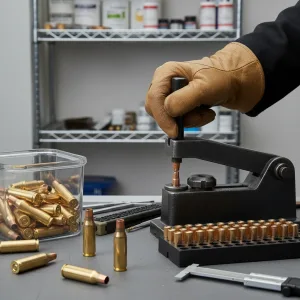
Proper Primer Seating Techniques
Proper primer seating is critical for consistent ignition. Primers must be seated fully and uniformly in the primer pocket. A primer that is not seated deeply enough, also known as a high primer, can cause misfires or even slam fires in semi-automatic firearms. A primer that is seated too deeply can be damaged, reducing its sensitivity and potentially causing a hangfire or misfire. Use a quality priming tool that provides consistent pressure and ensures the primer is seated to the correct depth, flush with the case head. Feel for resistance as you seat the primer, and inspect each case afterward. If you encounter excessive resistance, stop and investigate the cause. Ensure the primer pocket is clean and free of debris before seating the primer. A primer pocket cleaning tool can be helpful in this process. Consistent seating depth promotes even ignition and contributes to better accuracy.
Using Quality Reloading Equipment
Investing in quality reloading equipment is crucial for consistent and safe primer seating. A reliable reloading press with a smooth and consistent priming system is essential. Hand-priming tools also offer excellent control and feel, allowing you to seat primers with precision. Avoid using worn or damaged equipment, as this can lead to inconsistent primer seating and other issues. Regularly inspect your reloading press and hand-priming tool for wear and tear, and replace any worn parts promptly. A good priming tool will have a consistent feel and provide even pressure, ensuring that primers are seated uniformly. Furthermore, using a primer pocket uniformer can ensure that primer pockets are all the same depth, which aids in achieving consistent seating depths.
Maintaining Cleanliness and Organization
Cleanliness and organization are vital in reloading. Keep your reloading area free of dirt, debris, and spilled powder. Contamination can affect primer performance and lead to inconsistent ignition. Store primers in a cool, dry place away from direct sunlight and extreme temperatures. Avoid storing primers near solvents or other chemicals that could damage them. Organize your primers by type and lot number to ensure that you are using the correct primers for each load. Use dedicated containers for different primer types to prevent mixing them up. Regularly clean your reloading equipment to remove any residue that could interfere with primer seating or ignition.
Advanced Troubleshooting: When to Seek Expert Advice
Identifying Recurring Ignition Problems
If you consistently experience ignition problems despite following best practices, it’s time to troubleshoot systematically. Start by carefully documenting each instance of misfires, hangfires, or squib loads. Note the specific components used (primer type, powder, bullet), the reloading data, and any environmental conditions. Look for patterns. Are the problems occurring only with a specific lot of primers or powder? Are they more frequent in cold weather? Are they limited to a particular firearm? If you suspect a faulty batch of primers, contact the manufacturer. Also, ensure that your smokeless gun powder is not old or improperly stored as this can lead to poor ignition. Consider checking the firing pin protrusion and spring tension in your firearm, as these factors can also affect ignition reliability.
Consulting with a Qualified Gunsmith or Reloading Expert
When troubleshooting becomes complex, don’t hesitate to consult a qualified gunsmith or reloading expert. A gunsmith can inspect your firearm for mechanical issues that may be contributing to ignition problems, such as a worn firing pin or a weak hammer spring. A reloading expert can review your reloading practices and data to identify any potential errors or inconsistencies. Look for experienced reloaders in your local shooting community or contact reputable reloading supply companies for advice. They can often provide valuable insights and guidance that you might not find in manuals or online forums. Remember, safety is paramount, and seeking expert help is always the best course of action when you’re unsure.
Documenting Reloading Data for Analysis
Meticulous documentation of reloading data is an invaluable troubleshooting tool. Keep a detailed log of every load you create, including the primer type, powder charge, bullet weight, case dimensions, and overall cartridge length. Record the date and time of reloading, as well as the ambient temperature and humidity. After shooting, document the performance of each load, including accuracy, velocity, and any signs of pressure or ignition problems. This data can help you identify trends and pinpoint the source of any issues. Use a reloading logbook or a spreadsheet to organize your data. Over time, this information will become a valuable reference for optimizing your loads and troubleshooting problems.
Elevating Your Reloading Game: The Future of Reliable Ignition
Staying Updated on Primer Technology
The world of ammunition reloading is constantly evolving. Staying updated on primer technology ensures you’re using the best components and techniques available. Primer manufacturers are continually researching and developing new formulations and designs to improve ignition reliability, consistency, and safety. Read industry publications, attend reloading seminars, and follow reputable online forums to stay informed about the latest advancements. For instance, some manufacturers are exploring new primer compounds that are less sensitive to environmental factors or offer improved ignition with specific types of powder. By staying current with primer technology, you can refine your reloading practices and achieve even more reliable and consistent results.
Continual Learning and Refinement of Reloading Techniques
Reloading is a skill that requires continual learning and refinement. There’s always something new to learn or a technique to improve. Continual learning involves reading reloading manuals, attending workshops, and seeking advice from experienced reloaders. Refinement involves carefully analyzing your results and making incremental adjustments to your reloading process to optimize performance. Pay attention to details such as primer seating depth, powder charge consistency, and bullet seating depth. Experiment with different components and techniques, but always do so safely and systematically. Document your results and learn from your mistakes. Over time, you’ll develop a deeper understanding of the reloading process and be able to produce consistently accurate and reliable ammunition.
Investing in Quality Primers and Reloading Components (from Northern Reloading, of course!)
Ultimately, investing in quality primers and reloading components is the most effective way to ensure reliable ignition and consistent performance. At Northern Reloading, we offer a wide selection of premium primers from trusted brands, carefully selected for their quality, reliability, and consistency. We also provide a comprehensive range of other reloading components, including smokeless gun powder, bullets, and brass, to help you create the perfect loads for your needs. Remember, skimping on components can lead to inconsistent performance and even safety hazards. Choose quality components from reputable sources, and you’ll be well on your way to achieving consistent, reliable ignition and exceptional accuracy. Check back often for new product releases!
By carefully considering primer selection, employing proper reloading techniques, and staying informed about the latest advancements, reloaders can minimize ignition problems and achieve consistent, reliable results. Remember to consult reliable sources like reloading manuals and experienced reloaders when in doubt.


Add comment